How to pack a bike for moving
Moving can be stressful, especially when it involves precious items like your much-loved bicycle. If you've been wondering how to pack a bike for moving to avoid damage, you're in the right place. This guide will walk you through the process step-by-step, ensuring your bike arrives at your new home safe and sound through your interstate removalists.
Why packing your bike correctly matters
Your bike is more than just a mode of transport; it's an investment and sometimes even a passion. Properly packing your bike ensures it remains in peak condition during the move. Damage during transit can lead to costly repairs or even replacements.
And consider this: many moving companies require bikes to be packed in specific ways to ensure they're covered by insurance.
Gather the right materials
Before you start packing, make sure you have all the necessary materials. Having everything on hand will make the process smoother, more efficient and easier for you.
Essential packing materials
First, you'll need a sturdy bike box. These can be found at your local bike shop or ordered online. Additionally, gather bubble wrap, foam tubing, packing tape, and zip ties. Don't forget padding materials like old towels or blankets to provide extra cushioning.
Tools you'll need
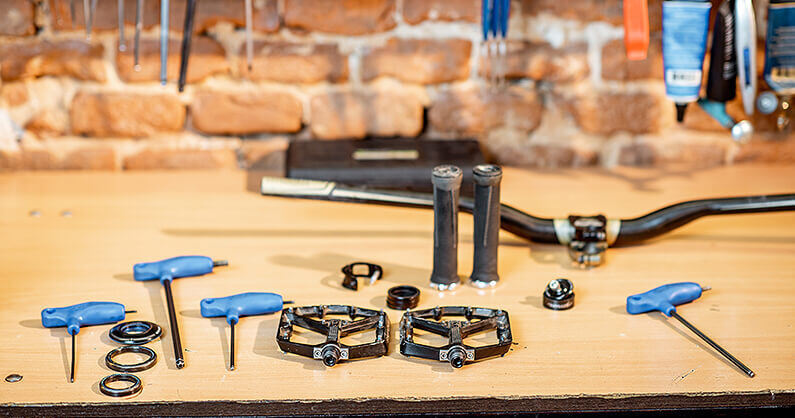
Have a set of Allen keys, a pedal wrench, pliers and a screwdriver ready. These tools will help you disassemble your bike safely. It's also a good idea to have a pair of scissors or a Stanley knife for cutting tape and bubble wrap.
Optional but useful items
Consider using wheel bags for added protection of your wheels. Also, packing peanuts can fill any empty spaces in the box, preventing excess movement during transit.
The checklist:
- Bike box
- Bubble wrap
- Foam tubing
- Packing tape
- Zip ties
- Old towels or blankets
- Allen keys
- Pedal wrench
- Pliers
- Screwdriver
- Scissors / Stanley knife
- Packing peanuts (optional)
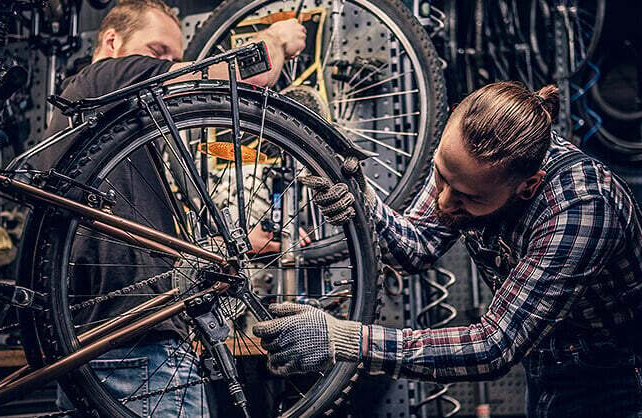
Disassemble your bike step-by-step
Disassembling your bike might sound like a breeze if you’ve done it before or a bit daunting, but breaking it down into smaller tasks can make it more manageable. Let’s go through the steps.
Remove the pedals
Start by using your pedal wrench to remove the pedals. Remember, the left pedal is reverse-threaded, so turn it clockwise to remove it. Place the pedals in a small bag to keep them together.
Take off the handlebars
Next, use Allen keys to loosen the bolts on the stem and remove the handlebars. Wrap the handlebars in bubble wrap for protection and secure them with packing tape. Allow the handles of gears and brakes to hang but secure them to the frame without stretching the cables. These handles need to be padded up so that they don’t scratch your frame.
Detach the wheels
Finally, remove the wheels by releasing the quick-release skewer or using an Allen key. Place the wheels in wheel bags if you have them, or wrap them in foam tubing and bubble wrap.
Protecting the frame and components
Properly protecting your bike's frame and components is crucial to prevent scratches and dents during the move.
Wrap the frame
Use bubble wrap or foam tubing to cover the frame. Quite often pool noodles are ideal for the frame tubing or forks. The only problem is you need to cut them lengthwise. Pay special attention to the areas most prone to damage, such as the top tube and down tube. Secure the wrapping with packing tape.
Pad the delicate parts
Wrap delicate components like the derailleur, chain, and gear shifters with bubble wrap. Use zip ties to hold the wrapping in place, ensuring these parts are well-protected. It's a good idea to give the derailleur, cogs, chain and any other greasy parts a wash with degreaser or petrol before packing them up.
Secure loose items
If there are any small parts or accessories, like the seat post or water bottle holder, remove them and pack them separately in a small box. Label the box to make reassembly easier.
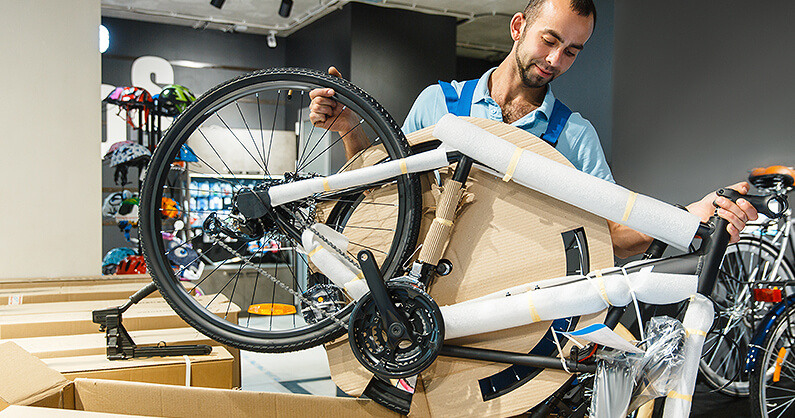
Packing your bike in the box
Now that your bike is disassembled and protected, it's time to pack it into the box. Ensure that the box is sturdy enough for the bike and strengthen any corners with additional tape.
Place the frame in the box
Lay down a layer of padding material at the bottom of the box. Carefully place the wrapped frame inside, ensuring it fits snugly. Use more padding to fill any gaps around the frame.
Add the wheels
Place the wrapped wheels on either side of the frame. Ensure there's enough padding between the wheels and the frame to avoid contact. You can use old towels or blankets for this purpose. Again pool noodles around the axle posts will stop the axles from bursting through the packing material.
Secure everything
Once everything is in the box, add additional padding to fill any remaining gaps. This will prevent movement during transit. Close the box and seal it with packing tape, reinforcing the edges for extra security.
Label and handle with care
Proper labelling, packing and handling will ensure your bike is treated with the care it deserves during the move.
Label the box
Clearly mark the box with "FRAGILE" and "THIS SIDE UP" labels. Include your contact information and destination address. If the box contains multiple pieces, number them for easy identification.
Communicate with your movers
Inform your local or interstate removalists about the bike box and its contents and while you're at it you can engage them to move your wrapped TV, fridge and mattresses. Provide any special instructions for handling. This ensures your movers are aware of the delicate nature of your packages.
Handle with care
If you're moving the box yourself, lift it carefully and avoid stacking heavy items on top. When loading it into a vehicle, secure it with straps to prevent shifting during transit.
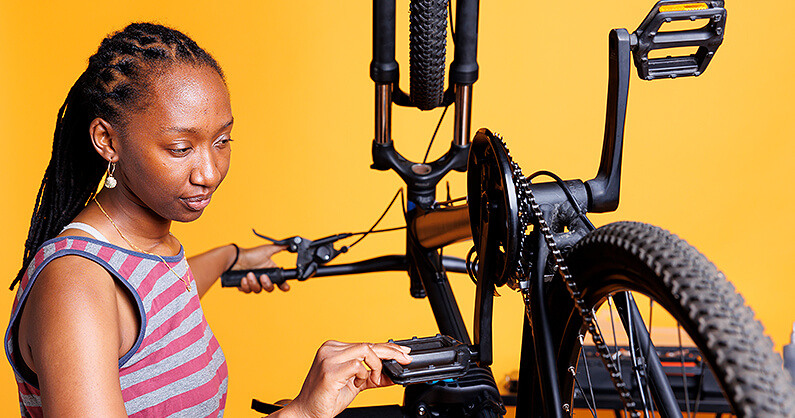
Reassembling your bike at your new home
Once you've reached your new home, it's time to reassemble your bike and get back on the road.
Unpack with caution
Carefully open the box and remove the padding materials. Lay out all the components and tools you'll need for reassembly. Double-check that you have all the parts before starting.
Reattach the components
Begin by reattaching the wheels, followed by the handlebars and pedals. Use your tools to securely tighten all bolts and screws. Refer to your bike's manual if needed.
Test and adjust
Before taking your bike for a spin, check that everything is functioning correctly. Adjust the brakes, gears, and seat height as necessary. Relubricate the moving parts with a good quality bike lubricant. Ensure the bike is safe and comfortable to ride. Take it for a short ride around the block but beware of things like gears slipping or brakes needing adjustment. Take it easy until you are sure of the bike's safety.
Additional tips for a smooth move
Here are a few extra tips to make the moving process even smoother.
Plan ahead
Start the packing process well in advance to avoid last-minute stress. Make a checklist of all the steps and materials needed to stay organised for your entire move.
Use professional services
If you're unsure about disassembling and packing your bike, consider using a professional bike packing service. Many bike shops offer this service for a fee.
Keep a maintenance kit handy
Have a basic bike maintenance kit on hand for any adjustments or minor repairs needed after the move. This should include a pump, spare tubes, and a multi-tool.
Conclusion
Packing your bike for a move doesn't have to be a hard task. By following these steps and using the right materials, you can ensure your bike arrives at your new home in perfect condition. Remember, the key to a successful move is preparation, engaging with quality interstate removalists and attention to detail.
Safe Travels and Happy Moving!